Note
Copilot Workspace is currently in public preview and is subject to change.
About using Copilot to help you work on your pull requests
After you create a pull request, you can continue working on the PR on the GitHub website. This article is about Copilot Workspace, which provides a Copilot-enabled environment for:
- Refining your pull requests
- Validating changes
- Integrating suggestions from reviewers
Copilot Workspace enables you to work on your pull requests in one place - on GitHub - from pull request creation to merge.
Copilot can help with pull requests in other ways too. These are explained in separate articles. Copilot can:
- Write a pull request summary for you - see Creating a pull request summary with GitHub Copilot.
- Review a pull request for you - see Using GitHub Copilot code review.
- Suggest fixes for coding problems identified by CodeQL code scanning - see Responsible use of Copilot Autofix for code scanning.
Benefits of Copilot Workspace
Copilot Workspace:
- Allows you to work on a pull request without having to switch back and forward between the GitHub website and your IDE.
- Gives you easy access to view/test/modify/apply coding suggestions, from Copilot code reviews and Copilot Autofix, as well as reviews by human reviewers.
- Gives you Copilot code completion suggestions on GitHub. Previously these were only available in an IDE.
- Shows you a list of files changed by the pull request, within the browser-based editor, but also allows you to find and edit any file from across the repo.
- Enables you to build, test, and run your code directly from the Workspace environment on GitHub.
Prerequisites
Using Copilot Workspace requires:
- A Copilot subscription. For more information, see Subscription plans for GitHub Copilot.
- Admission to the public preview from the waitlist. To apply to join the waitlist, see Join the Copilot code review waitlist.
- An existing pull request on the GitHub website. If you need help on creating a pull request, see Creating a pull request.
Without access Copilot Workspace you can still edit the files in pull requests by going to the Files changed tab, clicking the ellipsis (...) next to the file you want to edit, and then clicking Edit file.
Editing files in a pull request
To work on a pull request in Copilot Workspace:
-
Click the Open in Workspace button on the right side of the main page of a pull request.
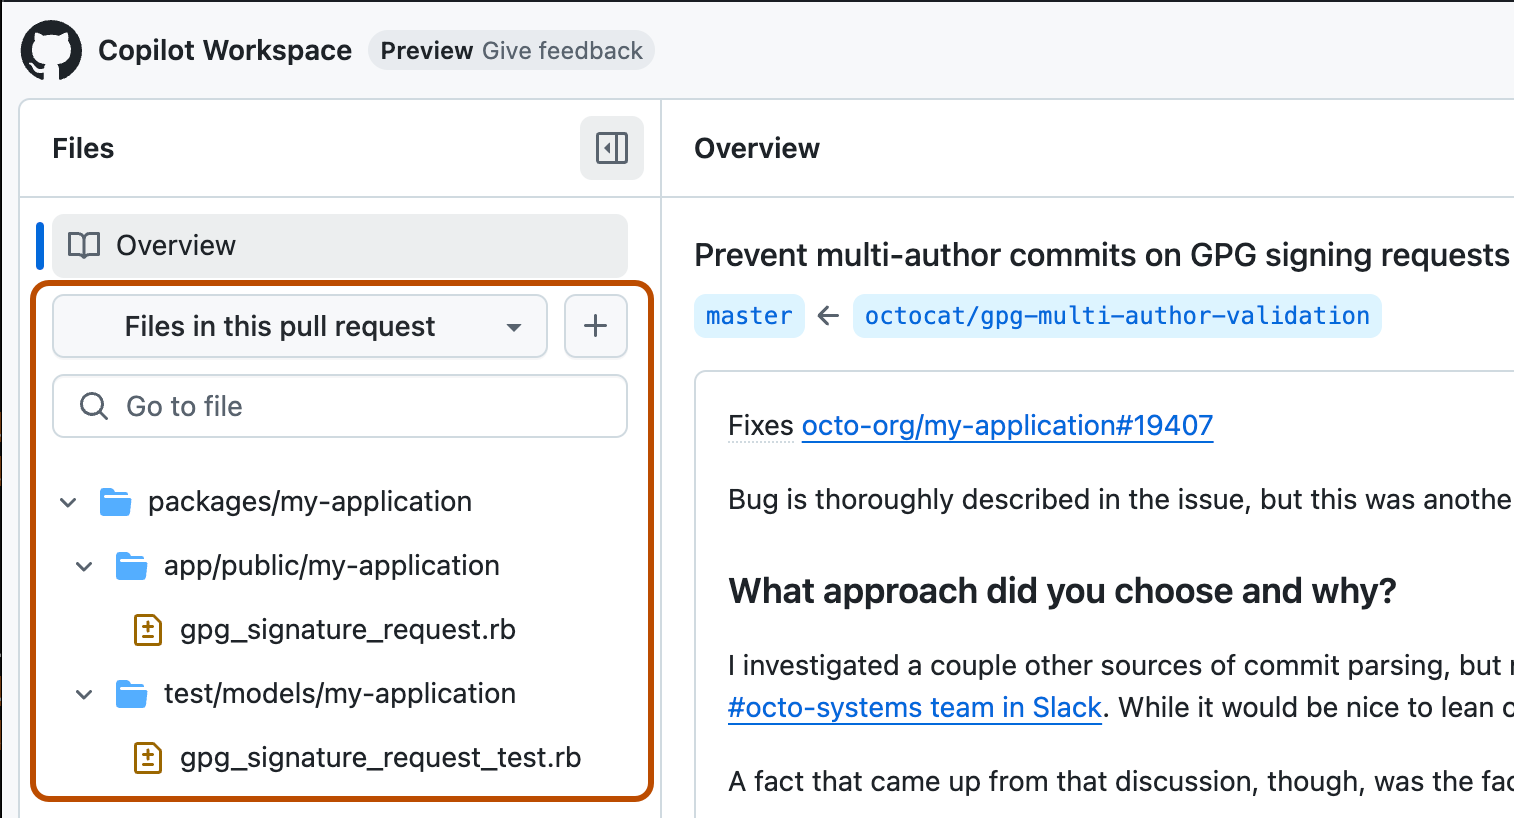
Copilot Workspace opens, displaying an overview of the pull request.
At the left of the Copilot Workspace window is a list of the files changed by the pull request.
-
To work on a file that is not currently changed by this pull request, click Files in this pull request and, from the dropdown, select All files in this repository.
-
Click a file in the list to open the file in the Workspace editor.
The file is displayed in a diff view. You can change the view if required. See Changing the Workspace options later in this article.
You can open and change multiple files before committing your changes.
-
After you have finished making changes, click Review and commit.
The Commit changes panel is displayed. Copilot autogenerates a commit message for you, based on the changes you have made. You can edit the message and add an extended description if you want.
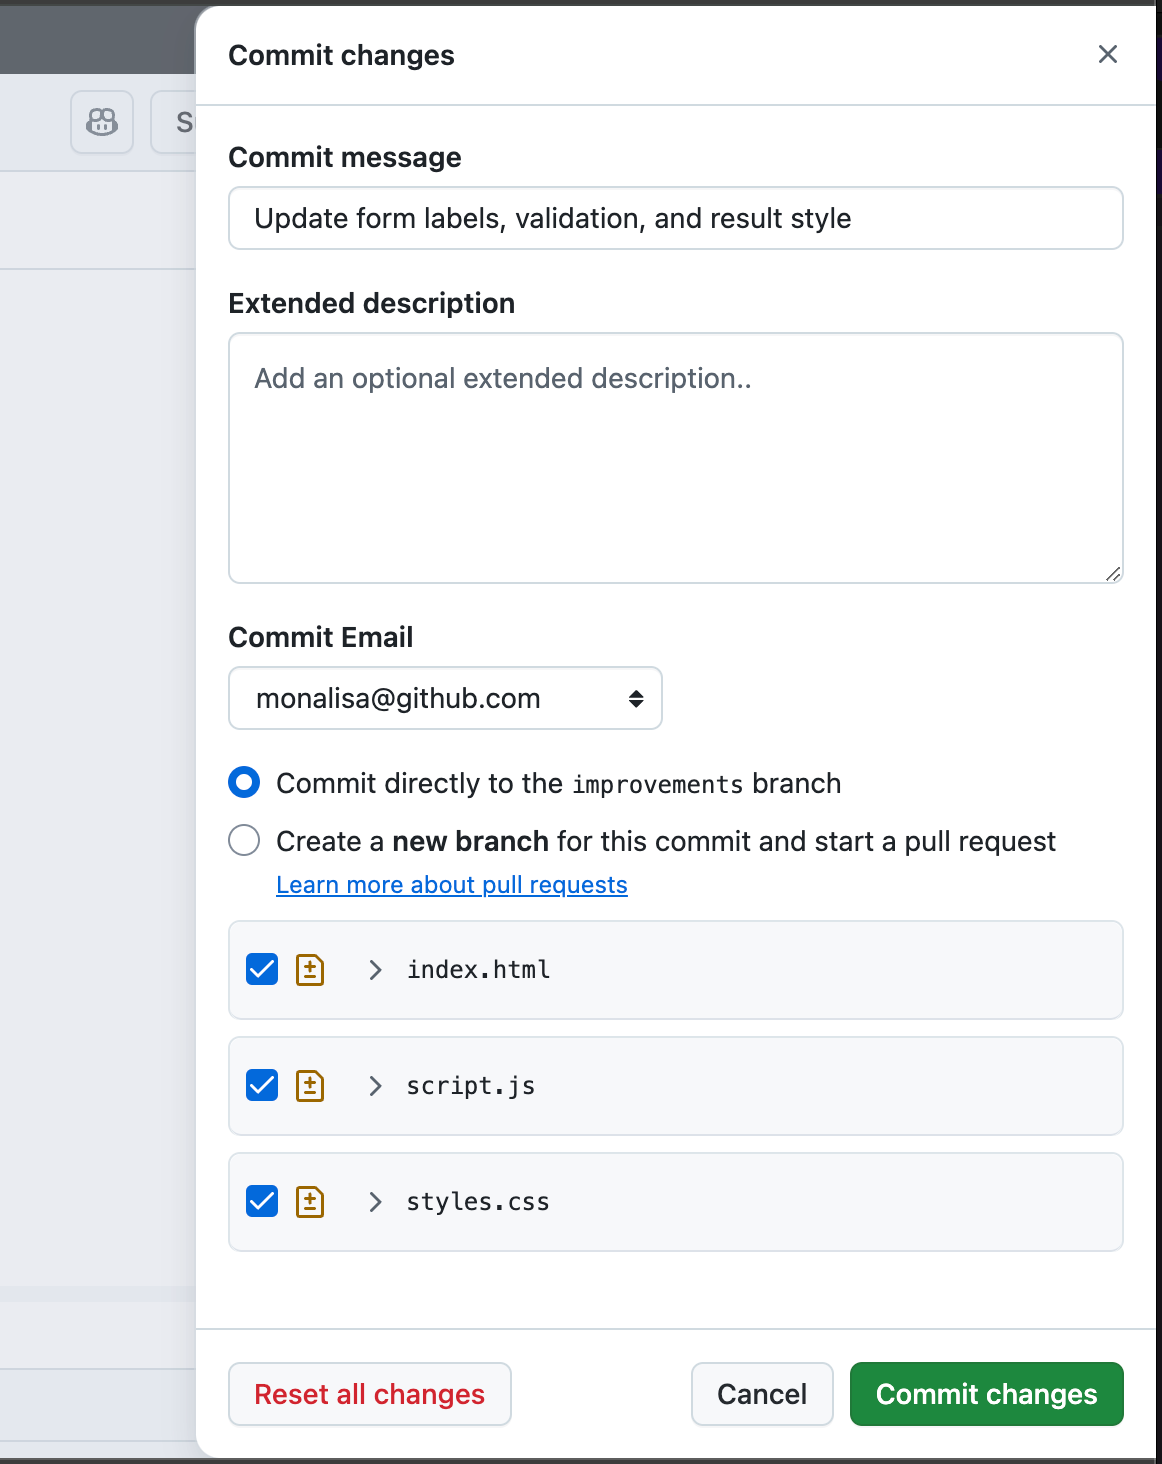
The panel lists the files you have changed. You can expand each file to see the changes you have made.
-
Optionally, if you edited multiple files and you decide you don't want to commit all of the changes in a single commit, clear the check box beside the files whose changes you don't want to commit. When you click Commit changes, the changes you applied to those files will remain applied but uncommitted, and you can add them to the pull request in a separate commit.
Note
If you clear the check box beside some files you may need to rewrite the commit message to avoid mentioning the changes to those files.
-
Click Commit changes.
Alternatively, click Reset all changes to return the files to their current state in the pull request, losing the changes you made in the Workspace editor panel. Resetting your changes cannot be undone.
Using Copilot to work on pull request comments
You can use Copilot Workspace to work through all comments on your pull request, one after the other, and then commit any changes you choose to make in a single commit.
-
On a comment that includes a code change suggestion, click Open in Workspace.
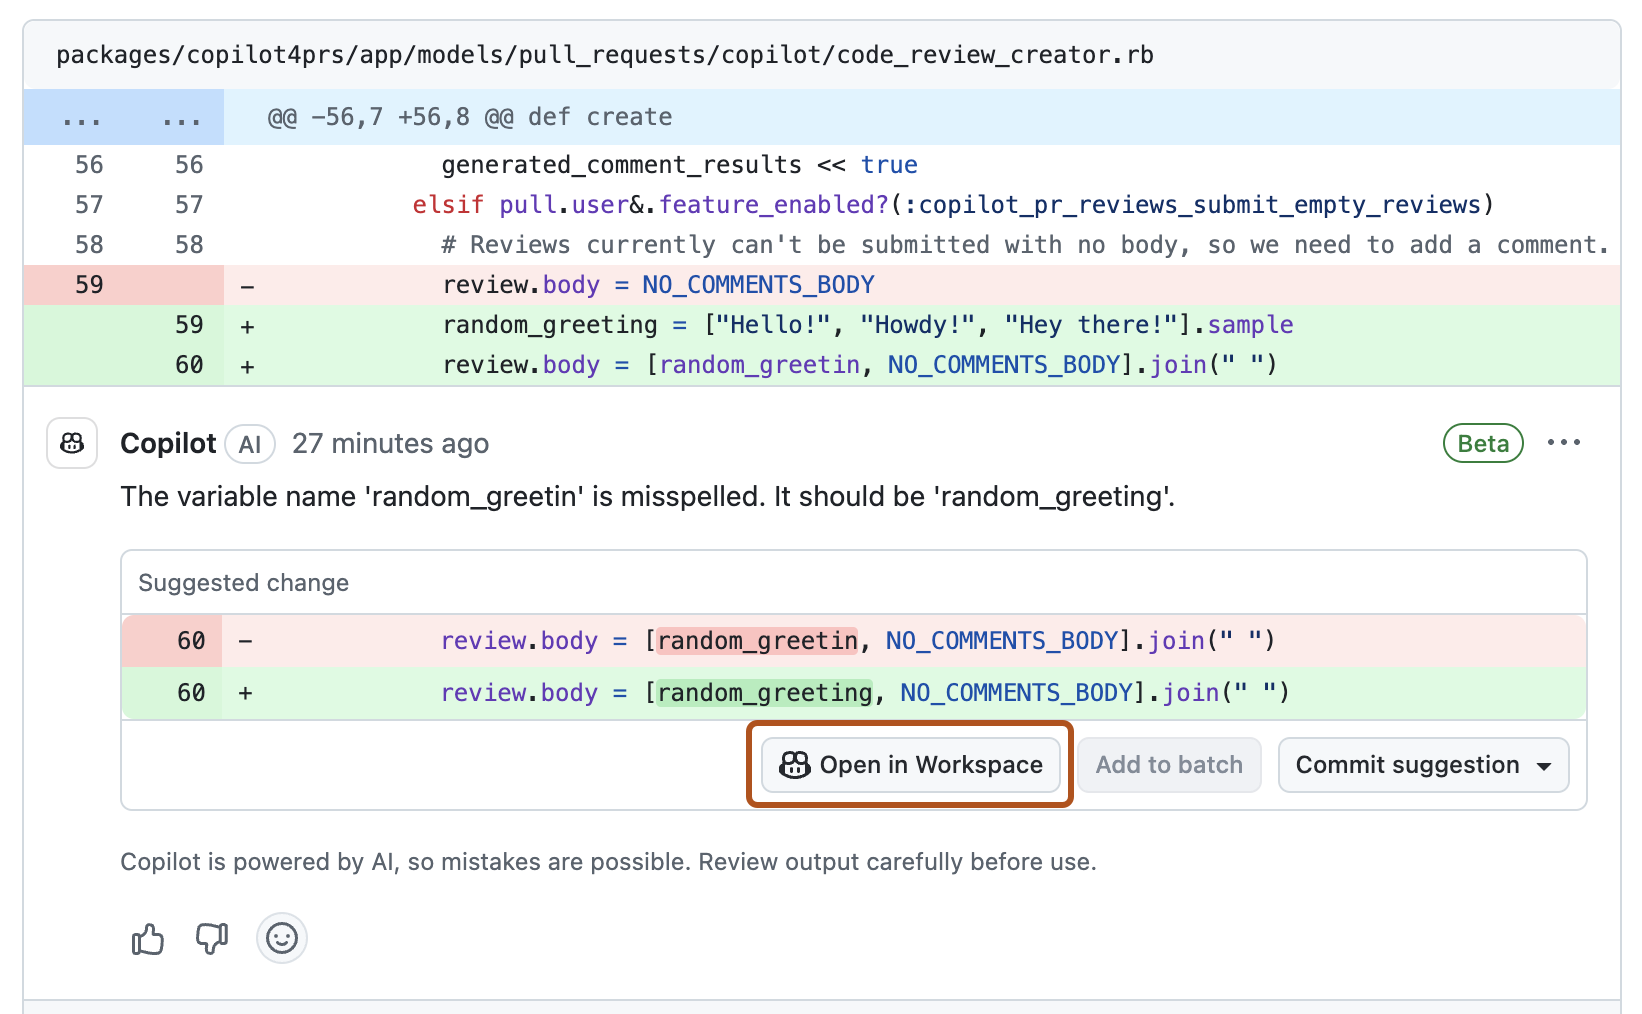
Copilot Workspace opens, displaying the suggested change in the Suggestions panel on the right of the Workspace window.
-
Review the suggested change, then click one of the two buttons at the bottom of the Suggestions panel:
- Apply - If you agree with the suggested change.
- Dismiss - If you do not want to make the suggested change.
-
If there are multiple comments in the pull request, you can step through to the next comment by clicking the > arrow at the bottom of the Suggestions panel.

-
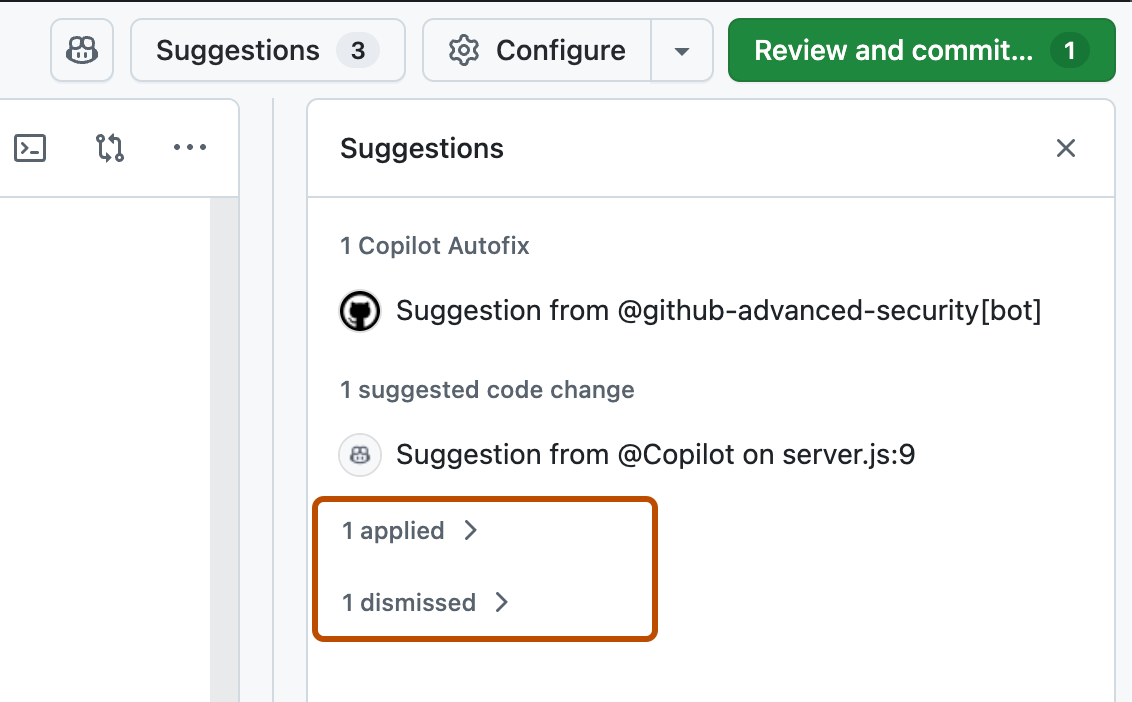
Optionally, to see a list of all of the comments in the pull request, click the back arrow at the top left of the Suggestions panel.
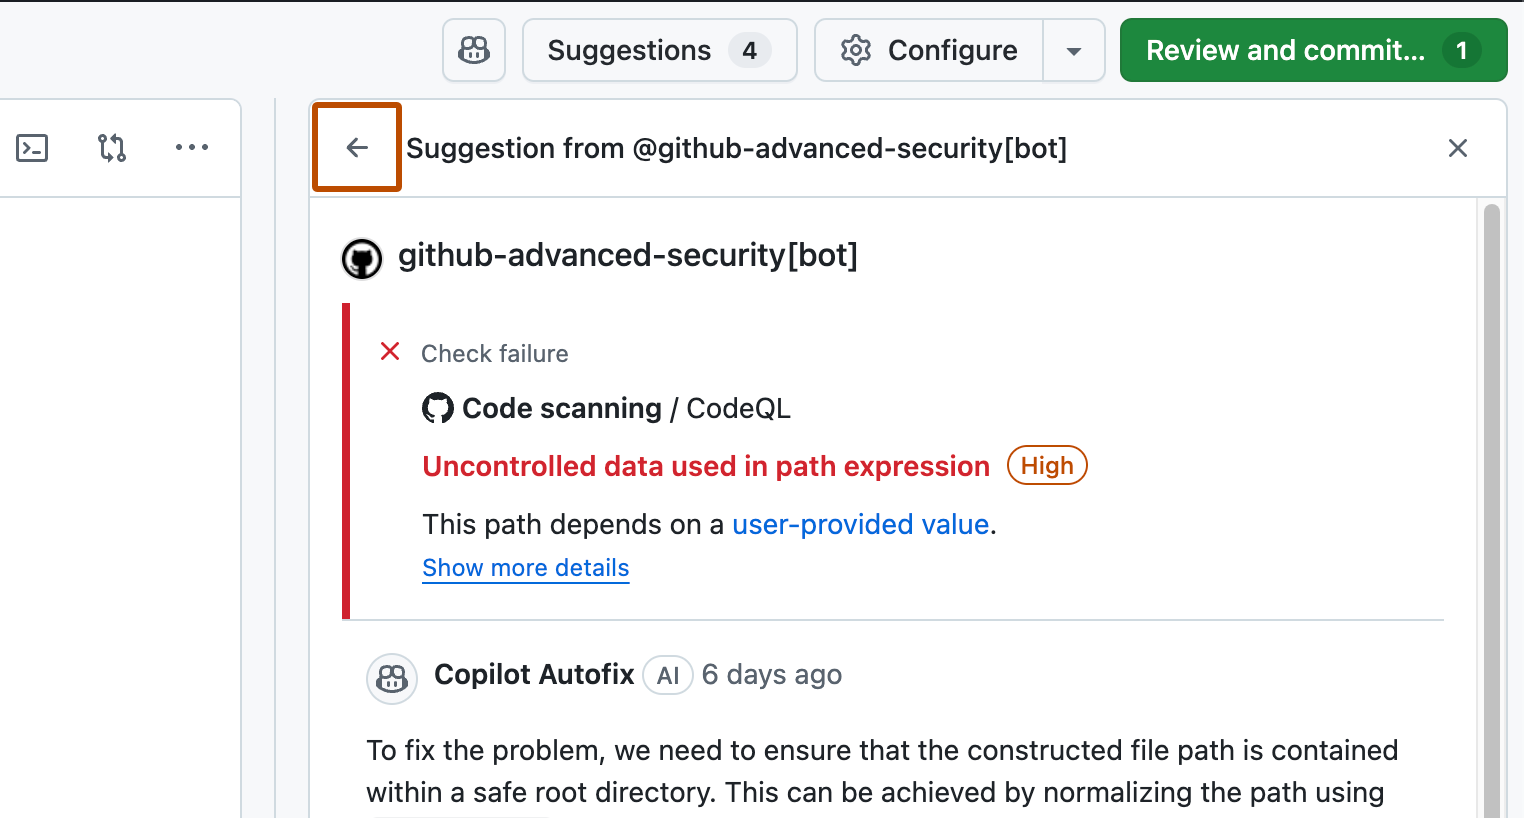
If you have accepted or dismissed any suggestions, these are shown within "applied" and "dismissed" dropdowns, which make it easy to see which suggestions you have not yet dealt with.
-
After you have finished reviewing the suggested changes, click Review and commit.
-
Optionally, if you decide you don't want to commit all of the applied changes in a single commit, clear the check box beside the files whose changes you don't want to commit. When you click Commit changes, the changes you applied to those files will remain applied but uncommitted, and you can add them to the pull request in a separate commit.
-
Click Commit changes.
Alternatively, click Reset all changes to return the suggestions to their initial state, losing the apply or dismiss choices you made, and losing any changes you made by editing files directly in the Workspace editor panel. Resetting your changes cannot be undone.
Chatting with Copilot about a pull request
-
At the top of the Workspace window, click the button.
-
At the bottom of the Copilot panel, type a question in the "Ask Copilot" box then press Enter.
You can ask questions about:
- The currently displayed file - for example, "how could I improve this file?"
- The whole pull request - for example, "what frameworks are referenced in this pull request?"
- General programming topics - for example, "what is the latest version of ruby?"
For more information, see Asking GitHub Copilot questions in GitHub.
Note
Currently not all Copilot Chat features are available in the public preview of Copilot Workspace.
Verifying your changes
Workspace includes a built-in terminal and a quick way to build, run, and test your code.
Opening the terminal
To open the terminal, click at the top right of the Workspace editor panel.
Note
The terminal requires a codespace to be running. If you don't see the icon, you may need to wait a few seconds for the codespace to start.
Running terminal commands
You can type commands directly into the terminal, or you can use quick commands to run commonly used commands with a couple of clicks.
Configuring personal quick commands
You can configure Build, Run, and Test commands that you can use when you work on a specific project in Copilot Workspace. If commands have already been configured for the repository, you can replace them with alternative commands for your own personal use.
-
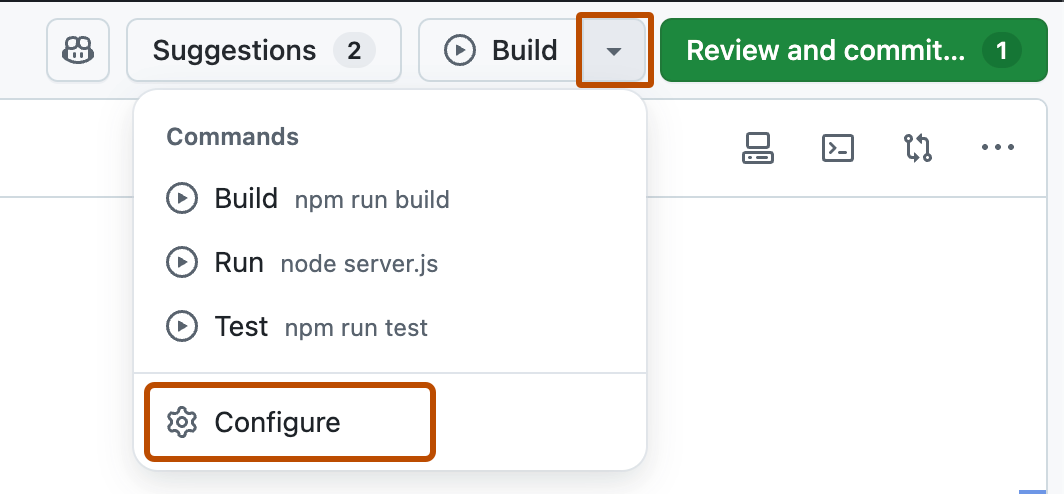
At the top of the Workspace window, click Configure.
If Build, Run, and Test quick commands have already been defined, the Build button is displayed instead of Configure. Click the dropdown arrow beside the Build button and then click Configure from the dropdown menu.
-
In the "Configure commands" dialog, enter the commands you want to use for Build, Run, and Test options.
-
Click Save.
Configuring quick commands for your repository
You can set default Build, Run, and Test commands for everyone who uses Copilot Workspace to work on pull requests for your repository.
-
Create or edit a file in the root of your repository called
.devcontainer/devcontainer.json.Note
The
.devcontainer/devcontainer.jsonfile is a configuration file for codespaces created for a repository. For more information, see Introduction to dev containers. -
Add a
commandssection as follows, replacing the example commands shown here with the commands that people working on your repository should use.{ "commands": { "Build": "make", "Run": "./bin/start", "Test": "make test" } } -
Click Save.
Using Workspace quick commands
-
To run the first of the defined quick commands (typically Build), click the button at the top of the Workspace window.
-
To run a different quick command, click the dropdown arrow beside the button and then click the command you want to run from the dropdown menu.
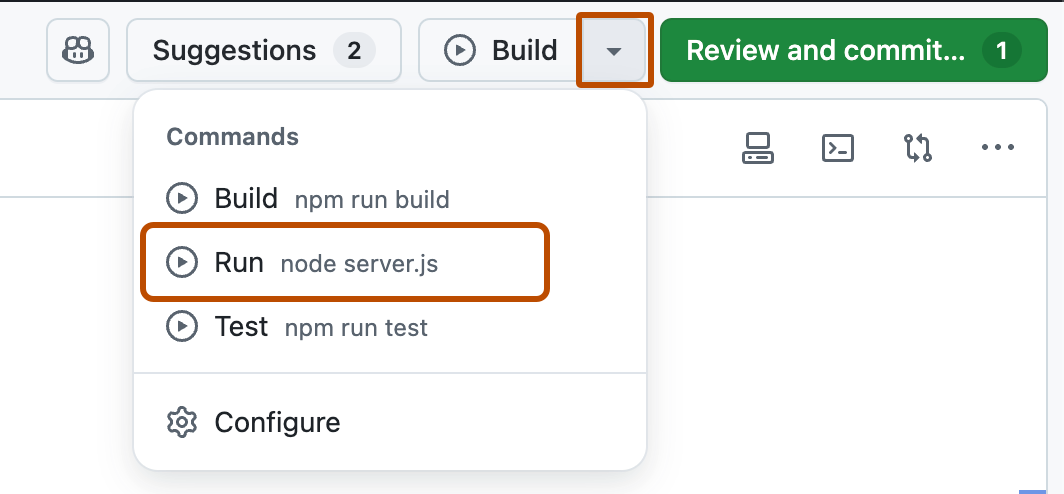
-
After clicking Run, while the process is running, you can click the dropdown arrow again and choose from options to stop or restart the process, or view the output from the run command.
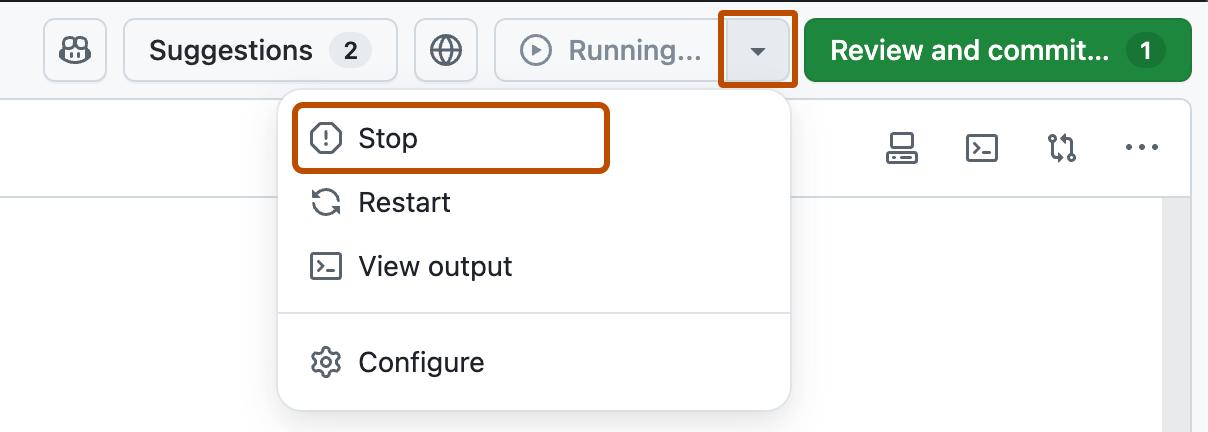
Previewing a web application
If your run command starts a web server, the button is displayed at the top of the Workspace window.
Click this button to preview the server output in a new tab of your browser.
Changing the Workspace options
You can change how files are displayed in Copilot Workspace.
Changing the diff view
-
Click the compare picker icon (), at the top right of the Workspace editor panel.
-
Choose a view option:
- Unified - Shows changes in a single view, with added lines highlighted in green and removed lines highlighted in red.
- Split - Shows changes in a split view, with the original file on the left and the new file on the right.
- Hidden - Shows the current state of the file in this pull request, without showing what changes the PR makes.
Wrapping long lines
- Click the ellipsis (...), at the top right of the Workspace editor panel.
- Click Wrap lines to toggle line wrapping on or off.