Introduction
Ce guide vous montre comment créer un workflow de base qui est déclenché lorsque du code est envoyé à votre référentiel.
Pour commencer à utiliser les flux de travail préconfigurés, parcourez la liste des modèles dans le référentiel actions/starter-workflows. Pour plus d’informations, consultez « Utilisation de modèles de workflow ».
Création d’un exemple de workflow
GitHub Actions utilise la syntaxe YAML pour définir le workflow. Chaque workflow est stocké en tant que fichier YAML distinct dans votre référentiel de code, dans un répertoire appelé .github/workflows.
Vous pouvez créer un exemple de workflow dans votre dépôt qui déclenche automatiquement une série de commandes chaque fois que du code est poussé (push). Dans ce workflow, GitHub Actions extrait le code envoyé, installe le framework de test bats et exécute une commande de base pour générer la version de bats : bats -v.
-
Dans votre dépôt, créez le répertoire
.github/workflows/pour stocker vos fichiers de workflow. -
Dans le répertoire
.github/workflows/, créez un nouveau fichier appelélearn-github-actions.ymlet ajoutez le code suivant.YAML name: learn-github-actions run-name: ${{ github.actor }} is learning GitHub Actions on: [push] jobs: check-bats-version: runs-on: ubuntu-latest steps: - uses: actions/checkout@v4 - uses: actions/setup-node@v4 with: node-version: '20' - run: npm install -g bats - run: bats -vname: learn-github-actions run-name: ${{ github.actor }} is learning GitHub Actions on: [push] jobs: check-bats-version: runs-on: ubuntu-latest steps: - uses: actions/checkout@v4 - uses: actions/setup-node@v4 with: node-version: '20' - run: npm install -g bats - run: bats -v -
Validez ces modifications et poussez-les vers votre dépôt GitHub.
Votre nouveau fichier de workflow GitHub Actions est maintenant installé dans votre dépôt et s’exécute automatiquement chaque fois que quelqu’un pousse (push) une modification vers le dépôt. Pour afficher les détails sur l’historique d’exécution d’un flux de travail, consultez Affichage de l’activité pour une exécution de flux de travail.
Présentation du fichier de workflow
Pour vous aider à comprendre comment la syntaxe YAML est utilisée pour créer un fichier de workflow, cette section explique chaque ligne de l’exemple d’introduction :
# Optional - The name of the workflow as it will appear in the "Actions" tab of the GitHub repository. If this field is omitted, the name of the workflow file will be used instead.
name: learn-github-actions

# Optional - The name for workflow runs generated from the workflow, which will appear in the list of workflow runs on your repository's "Actions" tab. This example uses an expression with the `github` context to display the username of the actor that triggered the workflow run. For more information, see [AUTOTITLE](/actions/using-workflows/workflow-syntax-for-github-actions#run-name).
run-name: ${{ github.actor }} is learning GitHub Actions

# Specifies the trigger for this workflow. This example uses the `push` event, so a workflow run is triggered every time someone pushes a change to the repository or merges a pull request. This is triggered by a push to every branch; for examples of syntax that runs only on pushes to specific branches, paths, or tags, see [AUTOTITLE](/actions/reference/workflow-syntax-for-github-actions#onpushpull_requestpull_request_targetpathspaths-ignore).
on: [push]

# Groups together all the jobs that run in the `learn-github-actions` workflow.
jobs:

# Defines a job named `check-bats-version`. The child keys will define properties of the job.
  check-bats-version:

# Configures the job to run on the latest version of an Ubuntu Linux runner. This means that the job will execute on a fresh virtual machine hosted by GitHub. For syntax examples using other runners, see [AUTOTITLE](/actions/reference/workflow-syntax-for-github-actions#jobsjob_idruns-on)
    runs-on: ubuntu-latest

# Groups together all the steps that run in the `check-bats-version` job. Each item nested under this section is a separate action or shell script.
    steps:

# The `uses` keyword specifies that this step will run `v4` of the `actions/checkout` action. This is an action that checks out your repository onto the runner, allowing you to run scripts or other actions against your code (such as build and test tools). You should use the checkout action any time your workflow will use the repository's code.
      - uses: actions/checkout@v4

# This step uses the `actions/setup-node@v4` action to install the specified version of the Node.js. (This example uses version 20.) This puts both the `node` and `npm` commands in your `PATH`.
      - uses: actions/setup-node@v4
        with:
          node-version: '20'

# The `run` keyword tells the job to execute a command on the runner. In this case, you are using `npm` to install the `bats` software testing package.
      - run: npm install -g bats

# Finally, you'll run the `bats` command with a parameter that outputs the software version.
      - run: bats -v
name: learn-github-actionsOptional - The name of the workflow as it will appear in the "Actions" tab of the GitHub repository. If this field is omitted, the name of the workflow file will be used instead.
run-name: ${{ github.actor }} is learning GitHub ActionsOptional - The name for workflow runs generated from the workflow, which will appear in the list of workflow runs on your repository's "Actions" tab. This example uses an expression with the github context to display the username of the actor that triggered the workflow run. For more information, see Workflow syntax for GitHub Actions.
on: [push]Specifies the trigger for this workflow. This example uses the push event, so a workflow run is triggered every time someone pushes a change to the repository or merges a pull request. This is triggered by a push to every branch; for examples of syntax that runs only on pushes to specific branches, paths, or tags, see Workflow syntax for GitHub Actions.
jobs:Groups together all the jobs that run in the learn-github-actions workflow.
check-bats-version:Defines a job named check-bats-version. The child keys will define properties of the job.
runs-on: ubuntu-latestConfigures the job to run on the latest version of an Ubuntu Linux runner. This means that the job will execute on a fresh virtual machine hosted by GitHub. For syntax examples using other runners, see Workflow syntax for GitHub Actions
steps:Groups together all the steps that run in the check-bats-version job. Each item nested under this section is a separate action or shell script.
- uses: actions/checkout@v4The uses keyword specifies that this step will run v4 of the actions/checkout action. This is an action that checks out your repository onto the runner, allowing you to run scripts or other actions against your code (such as build and test tools). You should use the checkout action any time your workflow will use the repository's code.
      - uses: actions/setup-node@v4
        with:
          node-version: '20'
This step uses the actions/setup-node@v4 action to install the specified version of the Node.js. (This example uses version 20.) This puts both the node and npm commands in your PATH.
- run: npm install -g batsThe run keyword tells the job to execute a command on the runner. In this case, you are using npm to install the bats software testing package.
- run: bats -vFinally, you'll run the bats command with a parameter that outputs the software version.
# Optional - The name of the workflow as it will appear in the "Actions" tab of the GitHub repository. If this field is omitted, the name of the workflow file will be used instead.
name: learn-github-actions

# Optional - The name for workflow runs generated from the workflow, which will appear in the list of workflow runs on your repository's "Actions" tab. This example uses an expression with the `github` context to display the username of the actor that triggered the workflow run. For more information, see [AUTOTITLE](/actions/using-workflows/workflow-syntax-for-github-actions#run-name).
run-name: ${{ github.actor }} is learning GitHub Actions

# Specifies the trigger for this workflow. This example uses the `push` event, so a workflow run is triggered every time someone pushes a change to the repository or merges a pull request. This is triggered by a push to every branch; for examples of syntax that runs only on pushes to specific branches, paths, or tags, see [AUTOTITLE](/actions/reference/workflow-syntax-for-github-actions#onpushpull_requestpull_request_targetpathspaths-ignore).
on: [push]

# Groups together all the jobs that run in the `learn-github-actions` workflow.
jobs:

# Defines a job named `check-bats-version`. The child keys will define properties of the job.
  check-bats-version:

# Configures the job to run on the latest version of an Ubuntu Linux runner. This means that the job will execute on a fresh virtual machine hosted by GitHub. For syntax examples using other runners, see [AUTOTITLE](/actions/reference/workflow-syntax-for-github-actions#jobsjob_idruns-on)
    runs-on: ubuntu-latest

# Groups together all the steps that run in the `check-bats-version` job. Each item nested under this section is a separate action or shell script.
    steps:

# The `uses` keyword specifies that this step will run `v4` of the `actions/checkout` action. This is an action that checks out your repository onto the runner, allowing you to run scripts or other actions against your code (such as build and test tools). You should use the checkout action any time your workflow will use the repository's code.
      - uses: actions/checkout@v4

# This step uses the `actions/setup-node@v4` action to install the specified version of the Node.js. (This example uses version 20.) This puts both the `node` and `npm` commands in your `PATH`.
      - uses: actions/setup-node@v4
        with:
          node-version: '20'

# The `run` keyword tells the job to execute a command on the runner. In this case, you are using `npm` to install the `bats` software testing package.
      - run: npm install -g bats

# Finally, you'll run the `bats` command with a parameter that outputs the software version.
      - run: bats -v
Visualisation du fichier de workflow
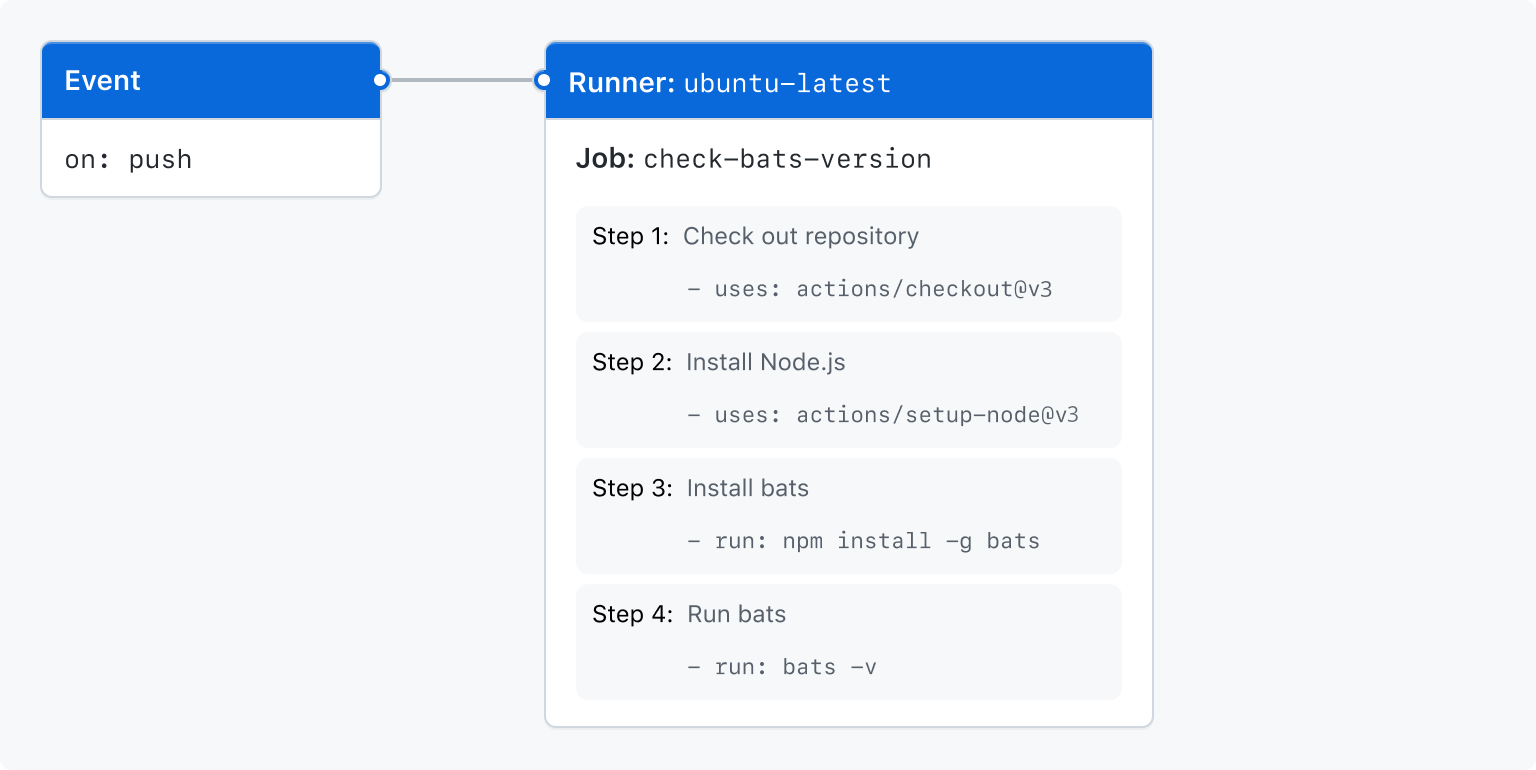
Dans ce diagramme, vous pouvez voir le fichier de workflow que vous venez de créer et comment les composants GitHub Actions sont organisés dans une hiérarchie. Chaque étape exécute une action ou un script d’interpréteur de commandes unique. Les étapes 1 et 2 exécutent des actions, tandis que les étapes 3 et 4 exécutent des scripts d’interpréteur de commandes. Pour trouver d’autres actions prédéfinies destinées à vos flux de travail, consultez Utilisation de blocs élémentaires pré-écrits dans votre workflow.

Affichage de l’activité pour une exécution de workflow
Lorsque votre workflow est déclenché, une exécution de workflow est créée et exécute le workflow. Une fois l’exécution de votre workflow démarrée, vous pouvez voir un graphe de visualisation de la progression de l’exécution, ainsi que l’activité de chaque étape sur GitHub.
-
Sur GitHub, accédez à la page principale du référentiel.
-
Sous le nom de votre dépôt, cliquez sur Actions.

-
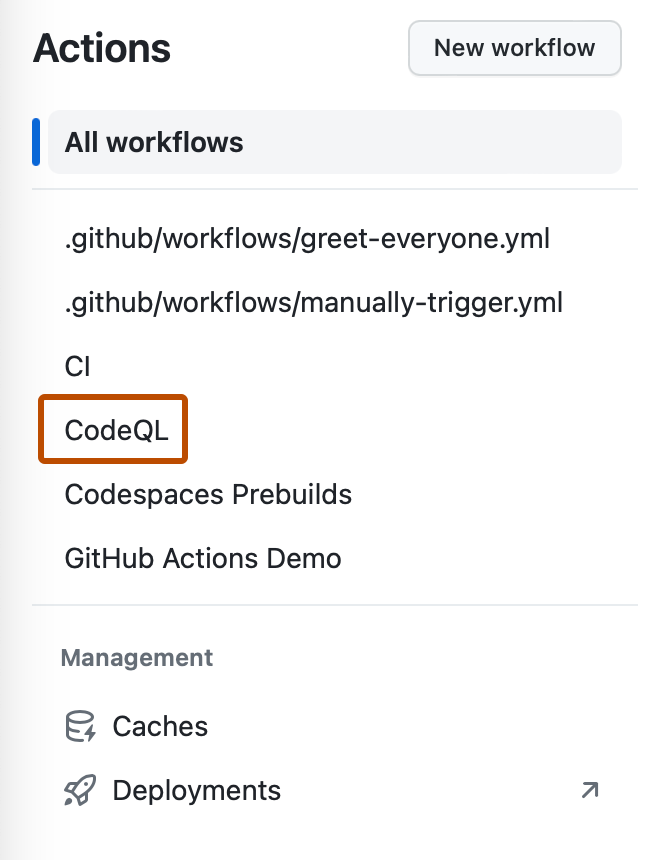
Dans la barre latérale gauche, cliquez sur le workflow que vous souhaitez afficher.

-
Dans la liste des exécutions de workflow, cliquez sur le nom de l’exécution pour voir le résumé de l’exécution du workflow.
-
Dans la barre latérale à gauche ou dans le graphe de visualisation, cliquez sur le travail que vous souhaitez voir.
-
Pour voir les résultats d’une étape, cliquez sur l’étape.