About domain verification
After verifying ownership of your organization's domains, a "Verified" badge will display on the organization's profile. If your organization has agreed to the GitHub Customer Agreement, organization owners will be able to verify the identity of organization members by viewing each member's email address within the verified domain. For more information, see About your organization's profile and Upgrading to the GitHub Customer Agreement.
If your organization is owned by an enterprise account, a "Verified" badge will display on your organization's profile for any domains verified for the enterprise account, in addition to any domains verified for the organization. Organization owners can view any domains that an enterprise owner has verified or approved, and edit the domains if the organization owner is also an enterprise owner. For more information, see Verifying or approving a domain for your enterprise.
To display a "Verified" badge, the website and email information shown on an organization's profile must match the verified domain or domains. If the website and email address shown on your organization's profile are hosted on different domains, you must verify both domains. If the website and email address use variants of the same domain, you must verify both variants. For example, if the profile shows the website www.example.com and the email address info@example.com, you would need to verify both www.example.com and example.com.
After verifying ownership of your organization's domain, you can restrict email notifications for the organization to that domain. For more information, see Restricting email notifications for your organization.
Note
To restrict email notifications to a verified domain, your organization must use GitHub Enterprise Cloud. For more information about how you can try GitHub Enterprise Cloud for free, see Setting up a trial of GitHub Enterprise Cloud.
You can also verify custom domains used for GitHub Pages to prevent domain takeovers when a custom domain remains configured but your GitHub Pages site is either disabled or no longer uses the domain. For more information, see Verifying your custom domain for GitHub Pages.
If you confirm your organization’s identity by verifying your domain and restricting email notifications to only verified email domains, you can help prevent sensitive information from being exposed. For more information see Best practices for preventing data leaks in your organization.
About domain approval
Note
The ability to approve a domain not owned by your organization or enterprise is currently in public preview and subject to change.
If you want to allow members to receive email notifications at a domain you don't own, you can approve the domain, then allow GitHub to send email notifications to addresses within the domain. For example, you can allow a contractor who doesn't have an email address within your own domain to receive email notifications at a domain you feel comfortable with.
After you approve domains for your organization, you can restrict email notifications for activity within the organization to users with verified email addresses within verified or approved domains. For more information, see Restricting email notifications for your organization.
Enterprise owners cannot see which organization members or email addresses receive notifications within approved domains.
Enterprise owners can also approve additional domains for organizations owned by the enterprise. For more information, see Verifying or approving a domain for your enterprise.
Verifying a domain for your organization
To verify a domain, you must have access to modify domain records with your domain hosting service.
-
In the upper-right corner of GitHub, select your profile photo, then click Your organizations.
-
Next to the organization, click Settings.
-
In the "Security" section of the sidebar, click Verified and approved domains.
-
Next to "Verified & approved domains for your enterprise account", click Add a domain.
-
Under "What domain would you like to add?", type the domain you'd like to verify, then click Add domain.
-
Follow the instructions under "Add a DNS TXT record" to create a DNS TXT record with your domain hosting service.
-
Wait for your DNS configuration to change, which may take up to 72 hours. You can confirm your DNS configuration has changed by running the
digcommand on the command line, replacingTXT-RECORD-NAMEwith the name of the TXT record created in your DNS configuration. You should see your new TXT record listed in the command output.dig TXT-RECORD-NAME +nostats +nocomments +nocmd TXT -
After confirming your TXT record is added to your DNS, follow steps one through three above to navigate to your organization's approved and verified domains.
-
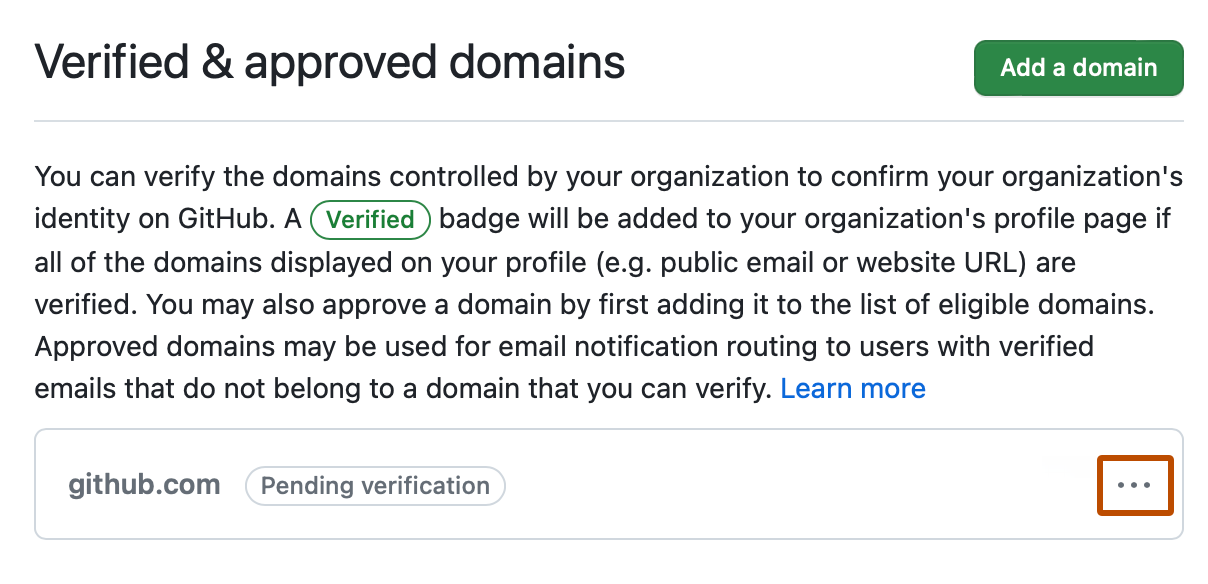
To the right of the domain that's pending verification, select the dropdown menu, then click Continue verifying.

-
Click Verify.
-
Optionally, once the "Verified" badge is visible on your organization's profile page, you can delete the TXT entry from the DNS record at your domain hosting service.
Approving a domain for your organization
Note
The ability to approve a domain not owned by your organization or enterprise is currently in public preview and subject to change.
-
In the upper-right corner of GitHub, select your profile photo, then click Your organizations.
-
Next to the organization, click Settings.
-
In the "Security" section of the sidebar, click Verified and approved domains.
-
Next to "Verified & approved domains for your enterprise account", click Add a domain.
-
Under "What domain would you like to add?", type the domain you'd like to verify, then click Add domain.
-
To the right of "Can't verify this domain?", click Approve it instead.

-
Read the information about domain approval, then click Approve DOMAIN.
Removing an approved or verified domain
-
In the upper-right corner of GitHub, select your profile photo, then click Your organizations.
-
Next to the organization, click Settings.
-
In the "Security" section of the sidebar, click Verified and approved domains.
-
To the right of the domain to remove, select the dropdown menu, then click Delete.
