Note
GitHub Codespaces is not available on subdomains of GHE.com, such as octocorp.ghe.com.
You can reopen any of your active or stopped codespaces on GitHub, in Visual Studio Code, or by using GitHub CLI. You can't reopen a codespace that has been deleted. See Understanding the codespace lifecycle.
You can view all your codespaces on the "Your codespaces" page at github.com/codespaces. From this page, you can:
- Open, stop, or delete your codespaces.
- See who owns (and may be billed for) your codespaces: your personal account, or organizations you belong to. See About billing for GitHub Codespaces.
- See the machine type, size, and status of your codespaces.
- Create a new codespace, either by choosing one of GitHub's templates or by clicking New codespace. See Creating a codespace from a template and Creating a codespace for a repository.
- Prevent automatic deletion of a codespace. See Configuring automatic deletion of your codespaces.
Resuming a codespace from a repository page
You can quickly resume a codespace when you're viewing a repository on GitHub.
-
With the Code tab of your repository displayed on GitHub, press , (the comma key).
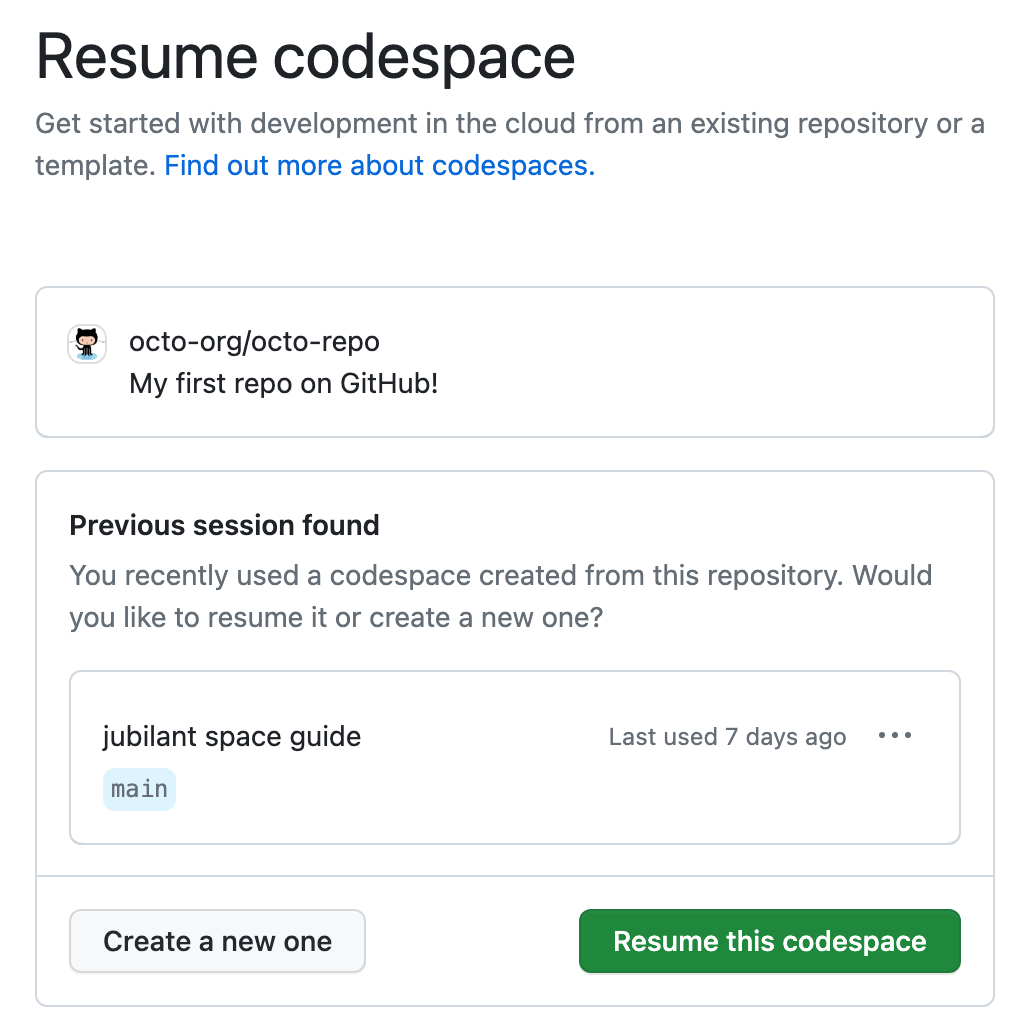
The "Resume codespace" page is displayed. This allows you to resume your most recently used codespace for the currently selected branch of the repository or, if you were viewing a pull request, for the topic branch of the pull request.

-
Click Resume this codespace.
Alternatively, if you want to create a new codespace for this branch of the repository, click Create a new one.
Note
If you don't have an existing codespace for this branch, the page is titled "Create codespace" and a button labeled Create a new codespace is displayed.
You can bookmark the address of this page if you want to get back to it quickly to resume your codespace. Alternatively you can use the address in a link to provide other people with a quick way of creating and resuming their own codespaces for this repository.
Opening an existing codespace from the "Your codespaces" page
-
In the top-left corner of GitHub, select , then click Codespaces to take you to the "Your codespaces" page at github.com/codespaces.
-
To open a codespace in your default editor, click the name of the codespace. You can set your default editor for Codespaces in your personal settings page. See Setting your default editor for GitHub Codespaces.
To open the codespace in an editor other than your default:
- Click the ellipsis (...) to the right of the codespace you want to open.
- Click Open in.
- Click Open in APPLICATION.

You can open the codespace in:
- Your browser
- Visual Studio Code
- JupyterLab
If you choose Visual Studio Code, you must make sure you have installed the selected application on your local machine.
If you choose JupyterLab, the JupyterLab application must be installed in the codespace. The default dev container image includes JupyterLab, so codespaces created from the default image will always have JupyterLab installed. For more information about the default image, see Introduction to dev containers and the
devcontainers/imagesrepository. If you're not using the default image in your dev container configuration, you can install JupyterLab by adding theghcr.io/devcontainers/features/pythonfeature to yourdevcontainer.jsonfile. You should include the option"installJupyterlab": true. For more information, see the README for thepythonfeature, in thedevcontainers/featuresrepository.
Linking to an existing codespace
You can create links to your existing codespaces. This is useful if you have a long-lived codespace that you return to frequently. You can save the link in a location of your choice, as an alternative to using the link on https://github.com/codespaces.
Note
You can only open your own codespaces. If someone clicks a link to one of your codespaces they will see a 404 error message.
Create a link using one of the following URL patterns. In these URLs CODESPACE-NAME represents the unique, permanent name of the codespace, such as literate-space-parakeet-w5vg5ww5p793g7g9, not the codespace's display name. You can find the name of a codespace by copying the link to the codespace on your https://github.com/codespaces page and extracting the codespace name from the URL.
| Link opens in | Link syntax |
|---|---|
| VS Code web client | https://CODESPACE-NAME.github.dev |
| VS Code web client with a specified workspace | https://CODESPACE-NAME.github.dev?folder=/workspaces/PATH/TO/WORKSPACE/DIRECTORY |
| VS Code desktop application | https://github.com/codespaces/CODESPACE-NAME?editor=vscode |
| JupyterLab | https://github.com/codespaces/CODESPACE-NAME?editor=jupyter |
Reopening an existing codespace
Note
To use GitHub Codespaces in VS Code, you need to install the Codespaces extension. See Using GitHub Codespaces in Visual Studio Code.
-
In the VS Code desktop application, open the Command Palette with Command+Shift+P (Mac) or Ctrl+Shift+P (Windows/Linux).
-
Type "Codespaces" and select one of the following commands.
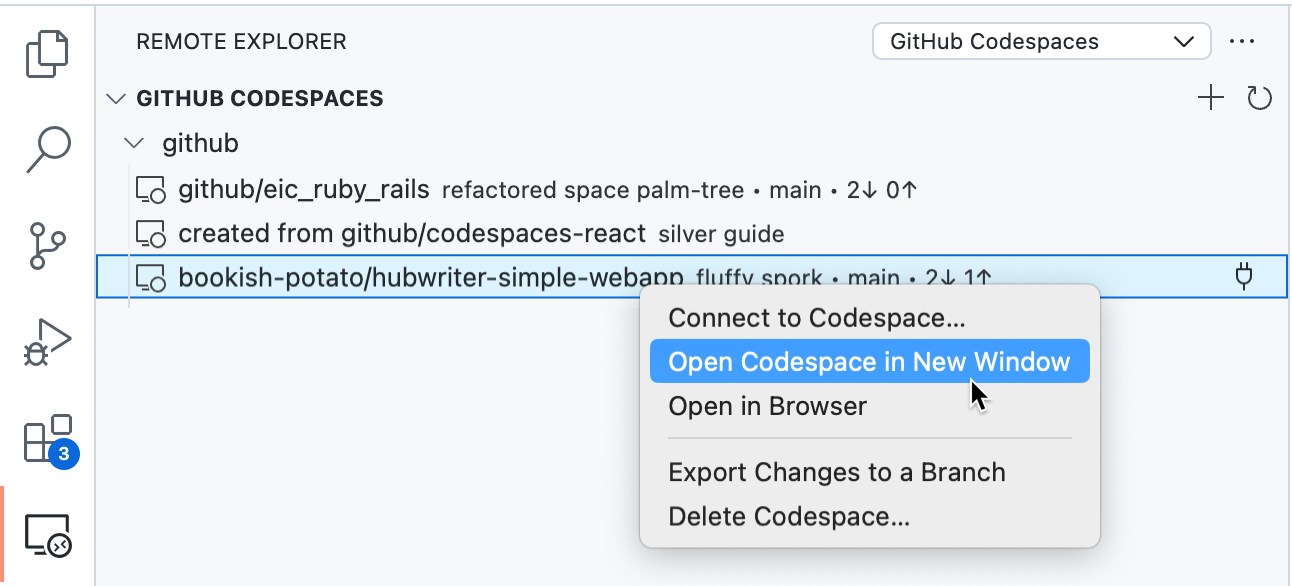
- To open a codespace in a new window of VS Code, select Codespaces: Open Codespace in New Window
- To open a codespace in the web editor, select Codespaces: Open in Browser
-
Click the codespace that you want to open.

You can also access the commands listed above by navigating to the Remote Explorer view in VS Code and right-clicking the codespace that you want to open.

Note
If the Remote Explorer is not displayed in the Activity Bar:
- Access the Command Palette. For example, by pressing Shift+Command+P (Mac) / Ctrl+Shift+P (Windows/Linux).
- Type:
details. - Click Codespaces: Details.
Linking to an existing codespace
You can create links to your existing codespaces. This is useful if you have a long-lived codespace that you return to frequently. You can save the link in a location of your choice, as an alternative to using the link on https://github.com/codespaces.
Note
You can only open your own codespaces. If someone clicks a link to one of your codespaces they will see a 404 error message.
Create a link using one of the following URL patterns. In these URLs CODESPACE-NAME represents the unique, permanent name of the codespace, such as literate-space-parakeet-w5vg5ww5p793g7g9, not the codespace's display name. You can find the name of a codespace by copying the link to the codespace on your https://github.com/codespaces page and extracting the codespace name from the URL.
| Link opens in | Link syntax |
|---|---|
| VS Code web client | https://CODESPACE-NAME.github.dev |
| VS Code web client with a specified workspace | https://CODESPACE-NAME.github.dev?folder=/workspaces/PATH/TO/WORKSPACE/DIRECTORY |
| VS Code desktop application | https://github.com/codespaces/CODESPACE-NAME?editor=vscode |
| JupyterLab | https://github.com/codespaces/CODESPACE-NAME?editor=jupyter |
Reopening an existing codespace
If you have installed GitHub CLI, you can use it to work with GitHub Codespaces. For installation instructions for GitHub CLI, see the GitHub CLI repository.
-
In a terminal, enter one of the following GitHub CLI commands.
-
To open a codespace in VS Code, enter:
Shell gh codespace code
gh codespace codeNote
You must have VS Code installed on your local machine. See Setting up Visual Studio Code in the VS Code documentation.
-
To open a codespace in the browser, enter:
Shell gh codespace code --web
gh codespace code --web -
To open a codespace in JupyterLab, enter:
Shell gh codespace jupyter
gh codespace jupyterNote
The JupyterLab application must be installed in the codespace you are opening. The default dev container image includes JupyterLab, so codespaces created from the default image will always have JupyterLab installed. For more information about the default image, see Introduction to dev containers and the
devcontainers/imagesrepository. If you're not using the default image in your dev container configuration, you can install JupyterLab by adding theghcr.io/devcontainers/features/pythonfeature to yourdevcontainer.jsonfile. You should include the option"installJupyterlab": true. For more information, see the README for thepythonfeature, in thedevcontainers/featuresrepository. -
To access a codespace from the command line, over SSH, enter:
Shell gh codespace ssh
gh codespace ssh
-
-
Using the arrow keys, navigate to the codespace that you want to open.
-
To open the codespace, press Enter.
See gh codespace code in the GitHub CLI manual.